Imaging Sonar Game Prototype
Pipe models made by Kim Betsgren .
Rowboat model made by Marinó Fannar Bjarnason .
Intro
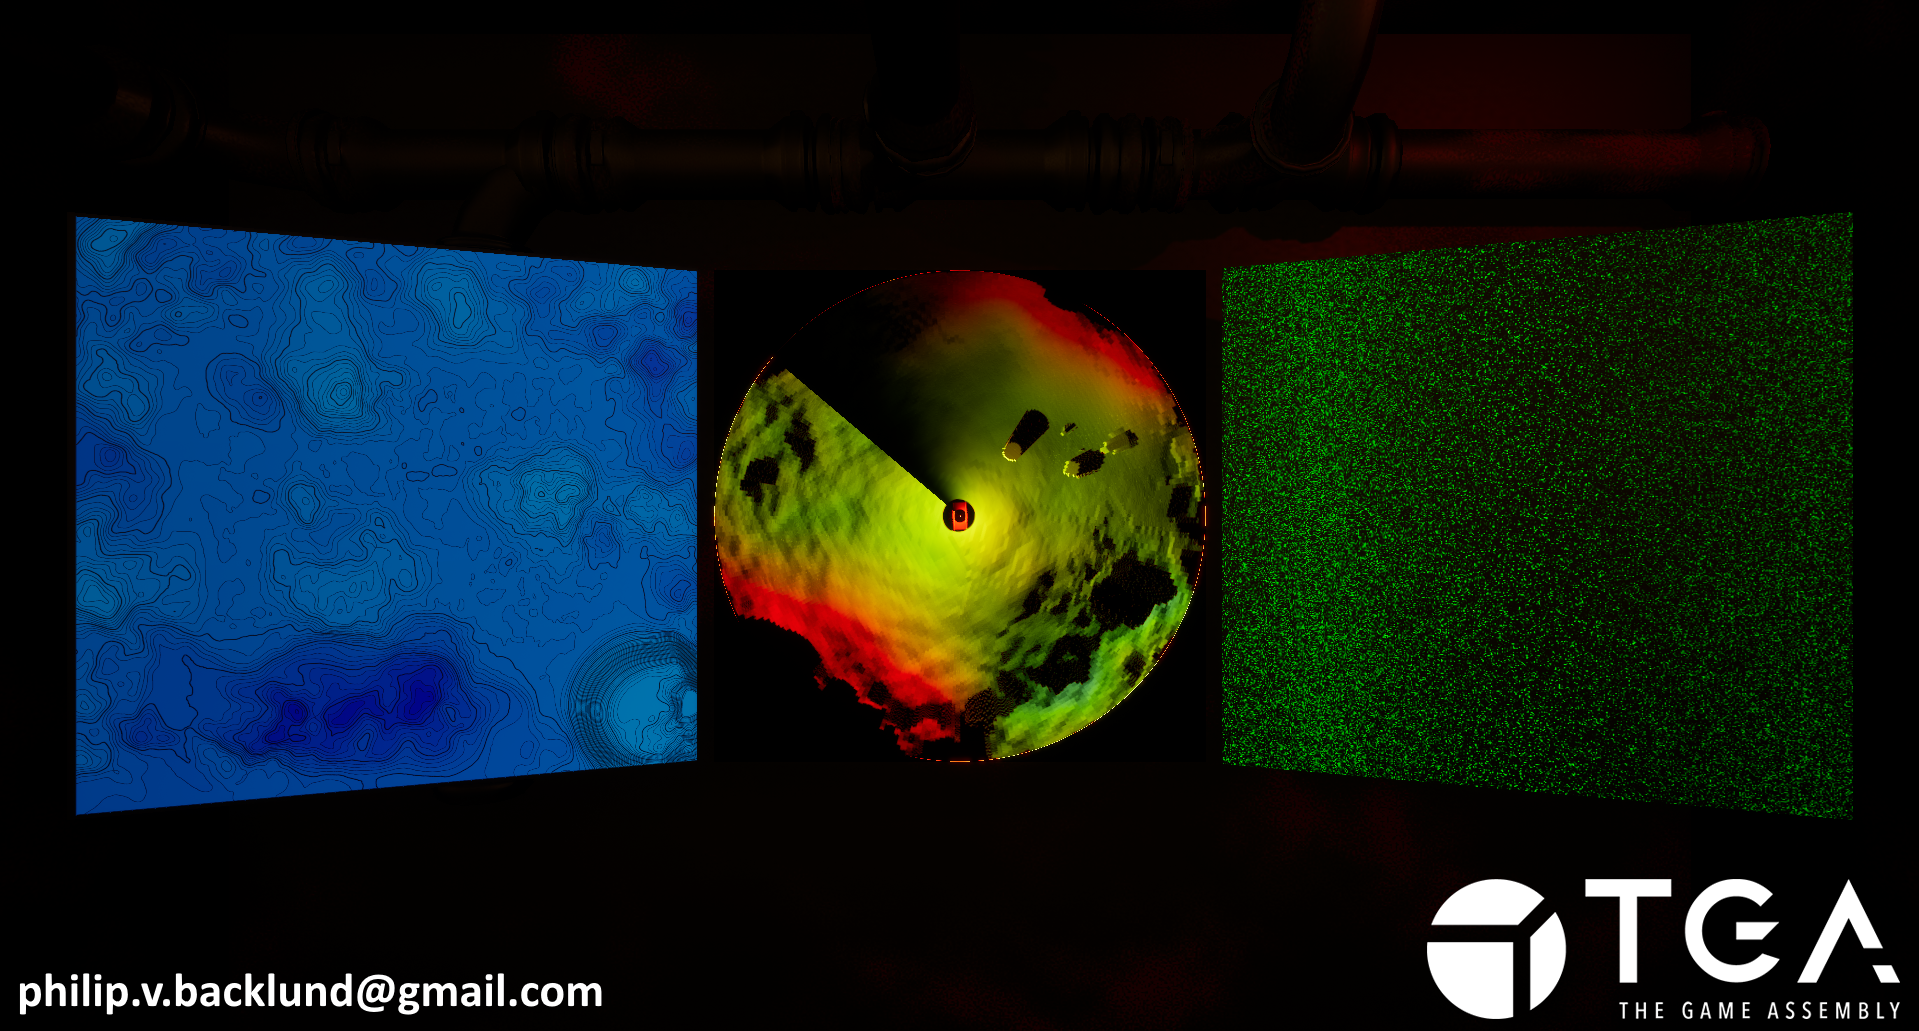
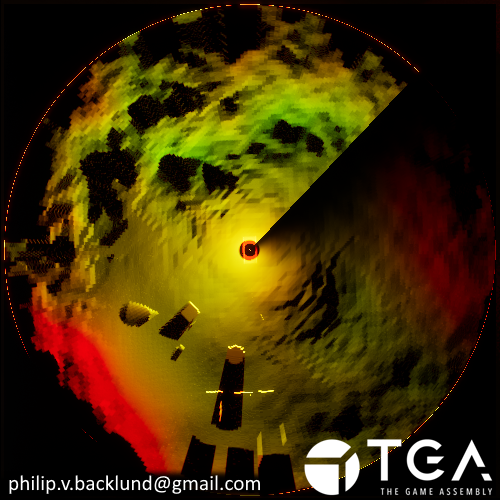
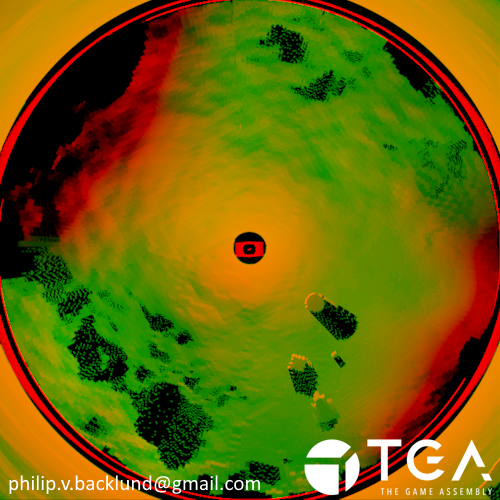
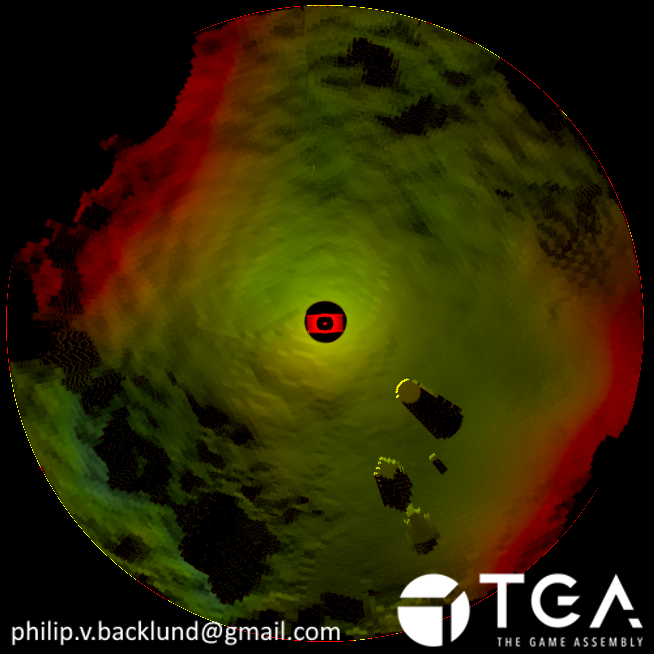
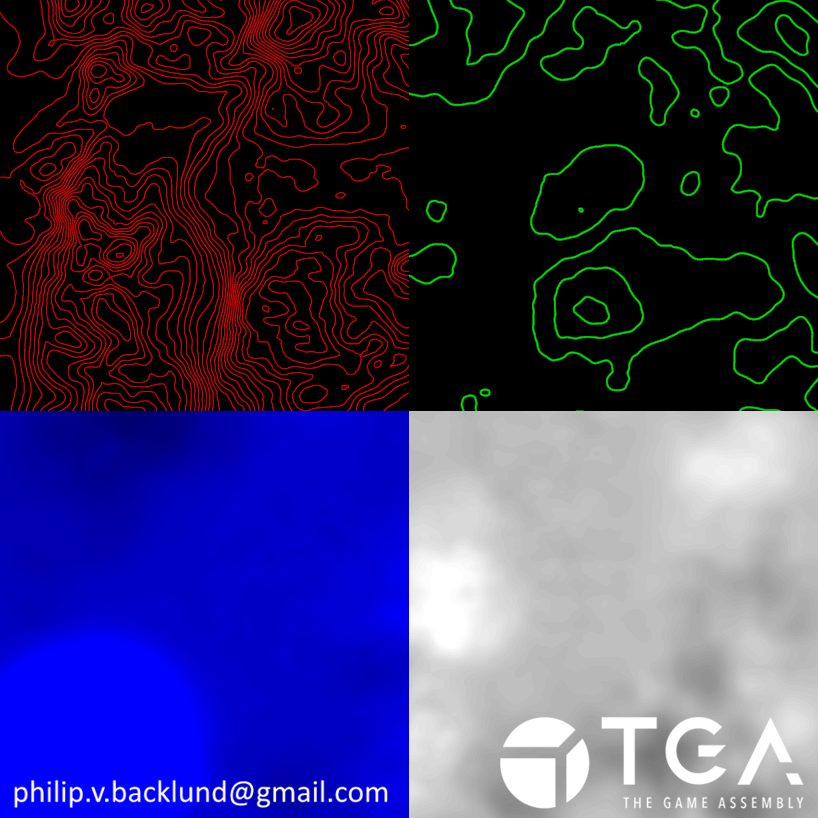
This is a submarine game prototype I made with imaging sonar, passive sonar and a topographic map. The idea is that the imaging sonar ( Center ) is your eyes and to figure out where you are you'd need to compare the map ( Left ) to the imaging sonar. The passive sonar's ( Right ) purpose would be to locate points of interests or dangers. The imaging sonar transforms a 360° panorama into a top down view. This is a remake of a project I did during my time at playground squad. I wanted to see what I could do differently with what I’ve learned at TGA. The old project was done almost entirely on the cpu which gave cool results but was terrible for performance. My goal with the remake was to have it run on the gpu with compute shaders to get better performance. The main focus is the Imaging Sonar while the Passive Sonar and Map are supporting pieces. The project was originally inspired by the torpedo scene in hunt for red october and a smarter every day’s video about passive sonar.
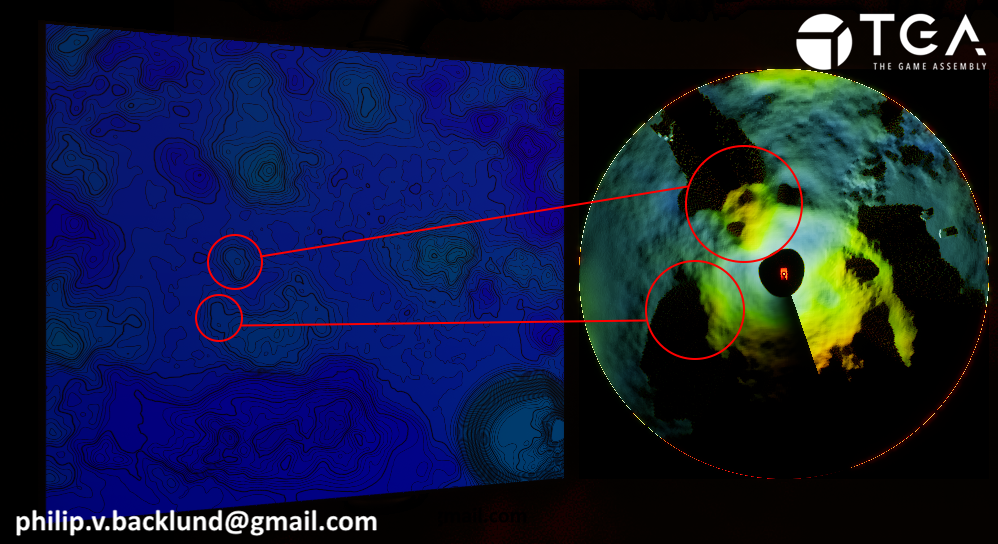
Comparing the map and imaging sonar
Shader Setup
Setting up compute shaders in Unreal can be a bit tedious. Normally, I need to create several files, define the required classes and functions, and make sure everything is properly connected before I can even begin writing the shader. To save time on the setup, I use Shadeup. I start by creating an empty plugin and telling Shadeup to use it for the shaders. I then define the module and compute shader names, and choose a template that renders to a render target. Shadeup generates the necessary files with the correct structure and naming automatically. Since Shadeup is built for Unreal Engine 5.3 and I am working in 5.6, some manual adjustments are needed. The generated code includes small issues, such as missing semicolons and incomplete dependency links, so I go through and clean those up to make sure everything compiles. After that, I can start sending parameters to the shader and focus on writing the actual logic.Imaging Sonar
Depth Panorama
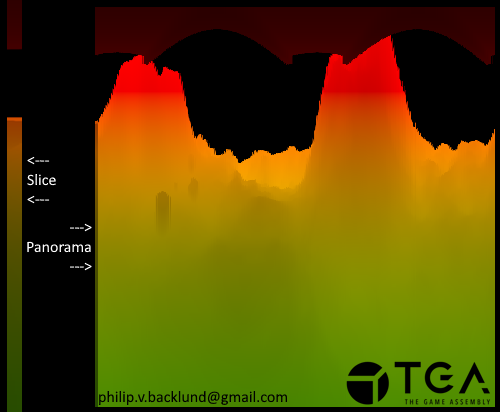
I needed to generate a 360° panorama.
Using a Scene Capture Cube would not allow for independent control over horizontal and vertical resolution. It was also too expensive as it renders a full 360° view while I only need to update a small slice each frame.
Instead, I captured the panorama incrementally by rotating a narrow-FOV Scene Capture 2D and stitching the slices together.
However, the default Scene Capture 2D does not support independent control over horizontal and vertical FOV. To solve this, I implemented a custom Scene Capture 2D with a modified projection matrix, enabling full control over both axes.
The slice FOV needed to be narrow because higher FOVs introduce noticeable perspective warping toward the edges. This distortion creates visible seams between slices and at high FOVs, can make the final image difficult to read.
I found a horizontal FOV of 2 degrees to be a good balance between coverage and image quality.
I looked into using Panini projection to reduce distortion at higher FOVs, but I was already happy with the results so I chose to focus on the topographic map and passive sonar instead.
Separating horizontal and vertical distance
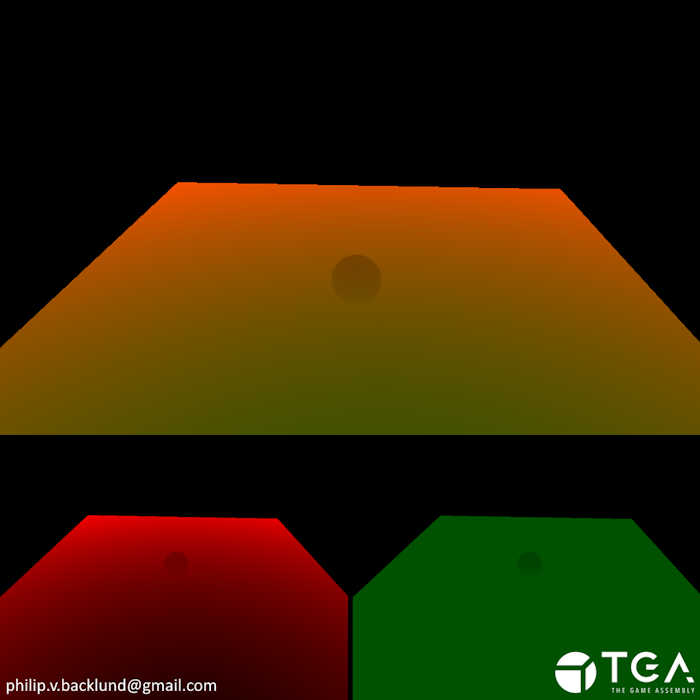
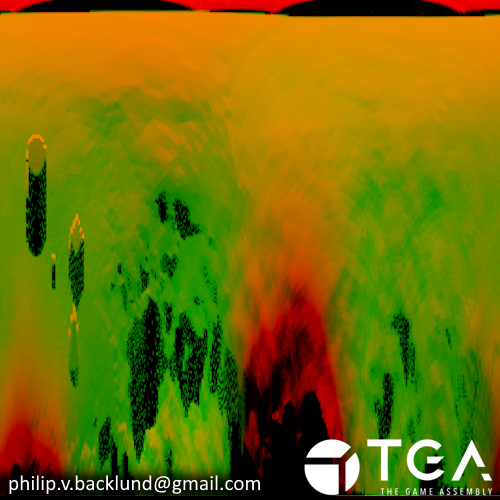
When using standard depth, the distance is taken along the view ray. This means that deeper areas of the ocean floor appear farther away, even if they are directly below the submarine.For a top-down view, this creates distortion. Points that are deeper are pushed outward when sorting pixels by distance. Standard depth also does not give enough information to determine how deep a point is relative to the submarine.
To address this, I separate horizontal and vertical distance into two channels using a post-process material. I get the vector from the camera to each pixel in world space.
I store the horizontal distance, which is the length of the XY components, in the red channel. I store the vertical distance, which is the Z component, in the green channel.
By doing this, I can sort pixels based purely on horizontal distance from the submarine, producing an undistorted top-down view, while using the vertical distance for the color.
I divide both distances by the maximum sonar range to normalize them.
Post Process
 Combined distance
Combined distance
Distortion Example
 Seperated distance
Seperated distance
Turning the panorama into a top down image
I already have the data I need in the panorama, but it isn’t arranged as a top-down view. So I rearrange it into one.I do this by sorting the pixels based on their horizontal distance, stored in the red channel. Because this value is already normalized, I can use it directly to set each pixel’s V coordinate.
For each pixel, I add 1.0 / PanoramaVerticalResolution to the red channel and store the vertical distance from the panorama in the green channel.
Using 1.0 / PanoramaVerticalResolution means the final red channel values would still be similar if I were to change the panorama resolution.
When multiple pixels map to the same coordinate, their red values accumulate. This naturally highlights surfaces like walls or steep slopes, where many pixels share the same horizontal distance.
For the green channel, I keep the lowest vertical distance from the pixels that end up at the same coordinate. This saves the information about the point closest to the submarine.
Panorama Sorted in to a top down view
Red Channel
Accumulation Highlight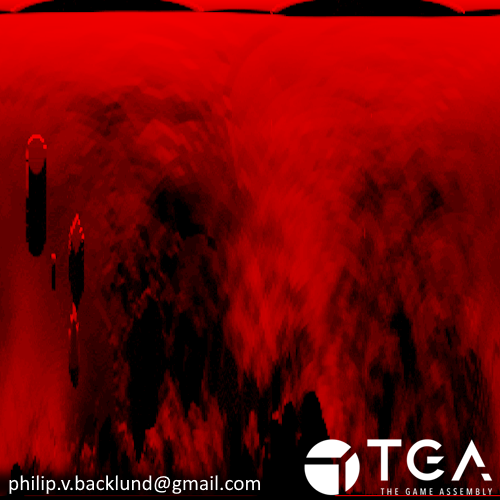
Accumulation Highlight
Green Channel
Vertical Distance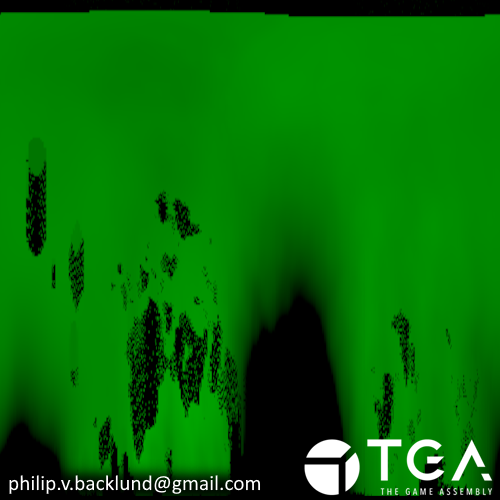
Vertical Distance
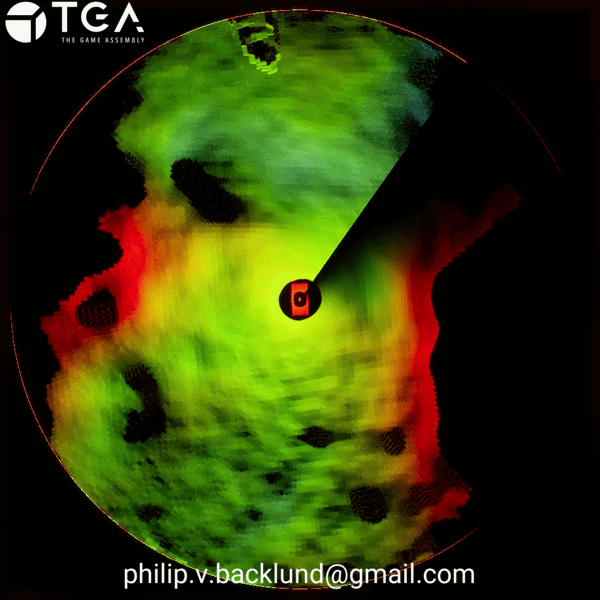
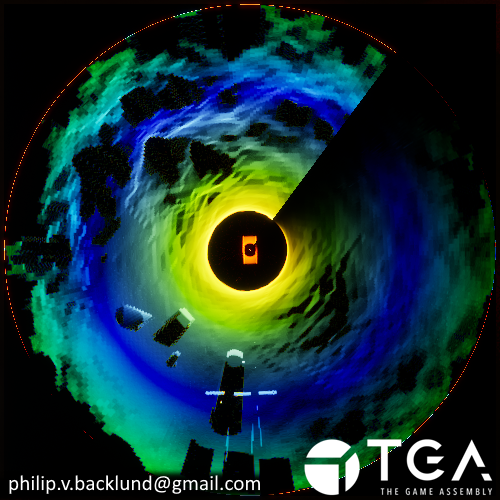
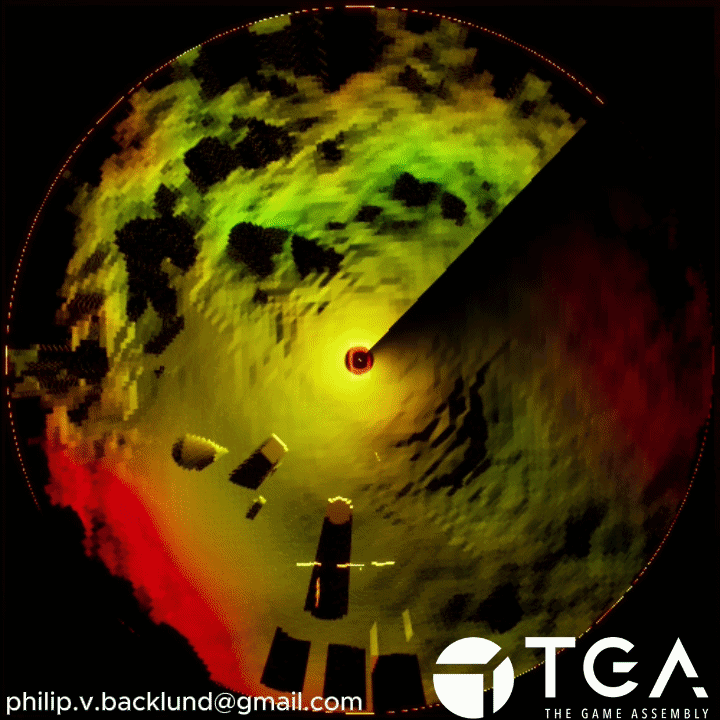
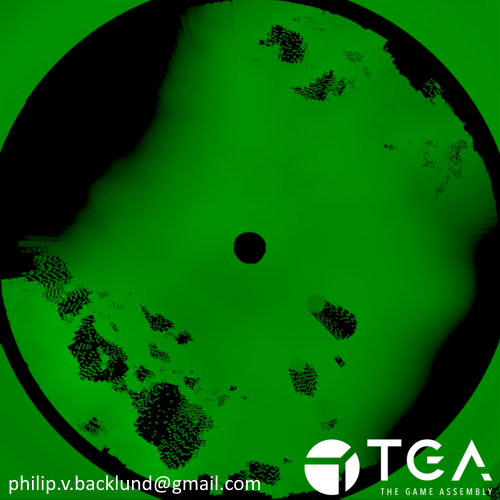
To make the top-down view intuitive, I warp the UV into a disc shape which puts the submarine at the center. This way, distances radiate outward from the center, making it easy to understand what’s forward, behind, or to the sides of the submarine.
Disc shaped UV
Sorted Panorama with disc UV
Color and final touches
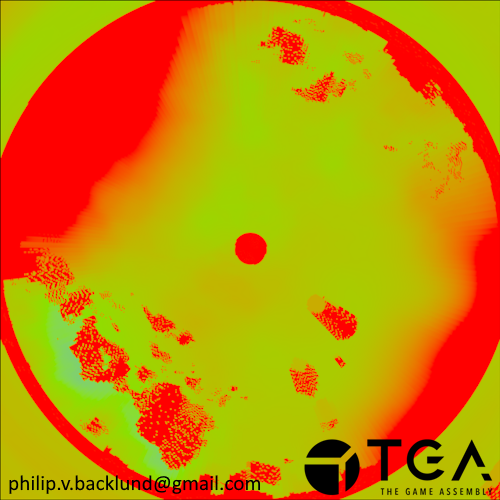
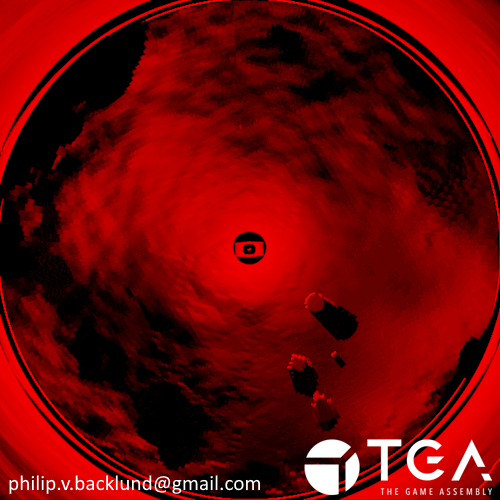
The resulting image contains all the information we need, but it’s not very readable or visually clear. To make it easier to interpret, I put the green channel through a color ramp to create a red->green->blue gradient. Red indicates heights similar to the submarine and potential collision risks, while green and blue show safer distances. I then use the red channel to control the emissive strength, highlighting slopes and walls.
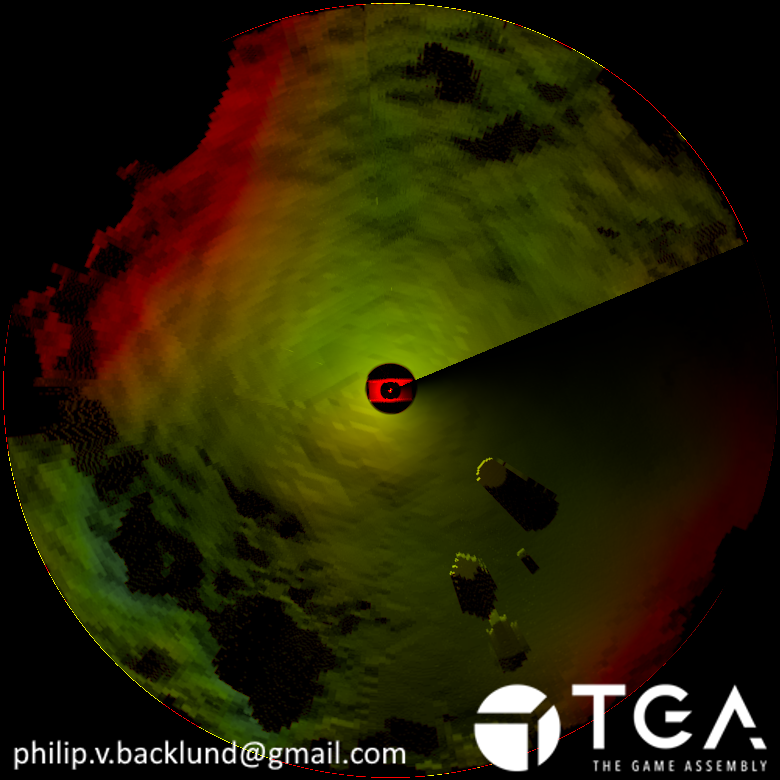
When the submarine isn't moving, sonar updates show very similar data, making it hard to see what’s being updated. To highlight the current update area, I add a rotating fade using the circular U coordinate to reduce emissive strength over distance. Pixels fade out over time and become bright again once the pixel is updated, giving visual feedback on the area of the map that's being updated.
Green Channel
Vertical Distance
 Color Ramp
 Scan Line

Red Channel
Accumulation Highlight
 Color Ramp * Red channel
 Final result
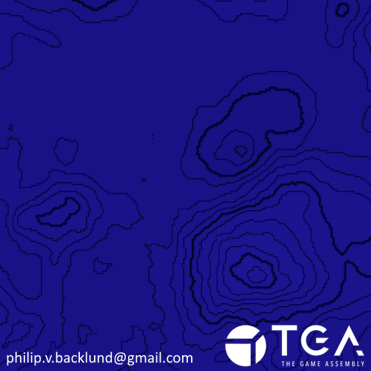
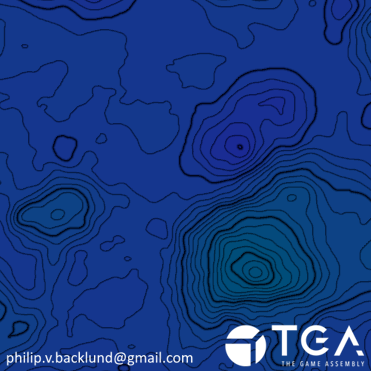
Topographic Map
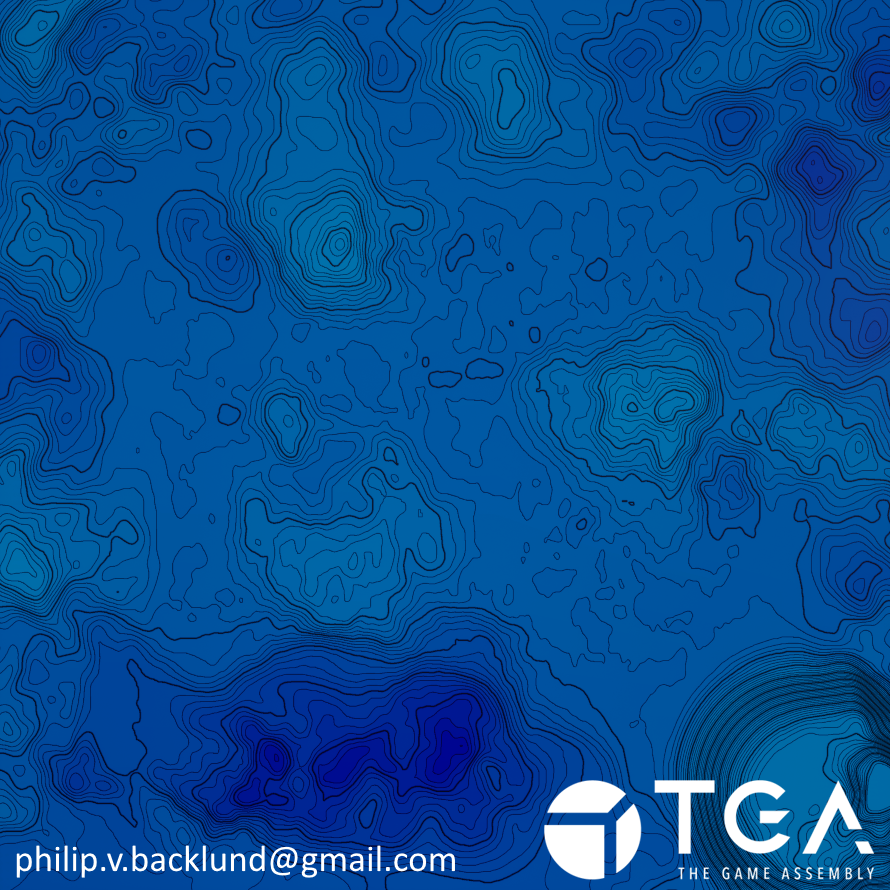
Generating the map texture
I generate a topographic map so the player can use it together with the imaging sonar to figure out their position relative to the terrain.
To do this, I take the landscape heightmap and process it in a compute shader. I also send in parameters for the contour line spacing, index line spacing, and the thickness of the lines.
To place the contour lines, I step the height values based on the contour line spacing so I can detect edges between levels. For example, with a spacing of 1.5 meters, the values become 0, 1.5, 3.0, 4.5…
To detect where lines should appear, I sample neighboring pixels within a radius defined by the line thickness. If a neighbor has a different stepped value,an edge has been found and the pixel contributes to a line. The closer the neighbor is, the stronger the contribution, and I keep the highest value. This produces a soft edge that effectively works as anti-aliasing.
I generate both contour lines and index lines at the same time so I can reuse the sampled values and avoid duplicate work.
Index lines use a larger step interval, based on a multiple of the contour spacing. The contour lines are stored in the red channel and index lines in green.
Since I already have the data, I also store the stepped heightmap and the original heightmap in the blue and alpha channels. This gives me flexibility later when making the display material for the map, without needing to go back and change the compute shader.
Map Texture

Map Texture 4 channels
Heightmap Resolution Issue
The original heightmap is lower resolution than the final map texture, which makes the source resolution visible in the result. Without any changes, the contour lines appear blocky and follow the original pixel grid.
To reduce this, I sample a few neighboring pixels and average the result to blur the data slightly. This removes the stair-stepping effect, giving me smooth lines.
Low resolution issue
Resolution fixed
Passive Sonar
What is is passive sonar
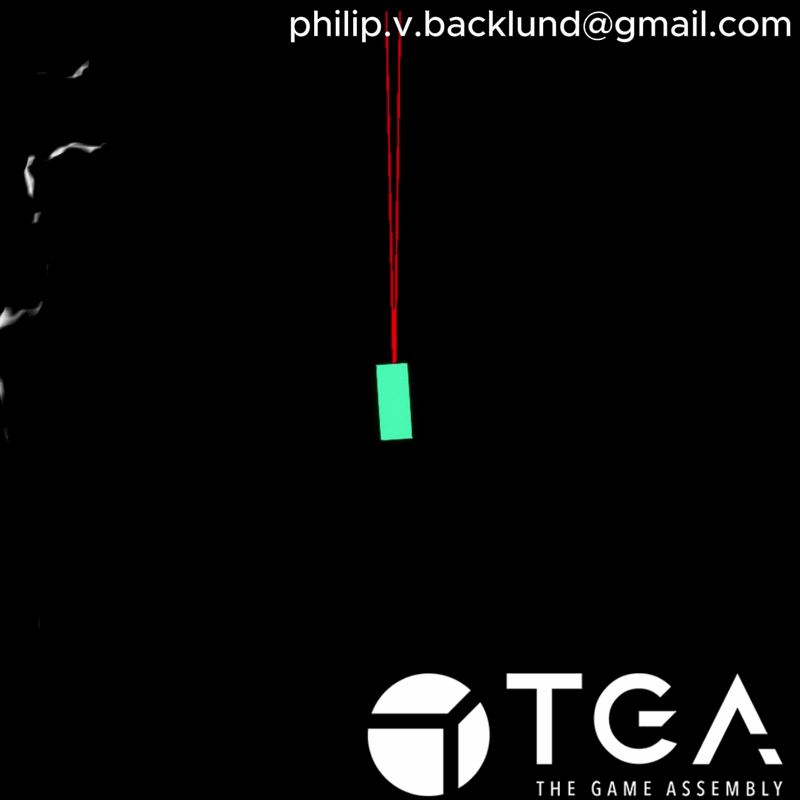
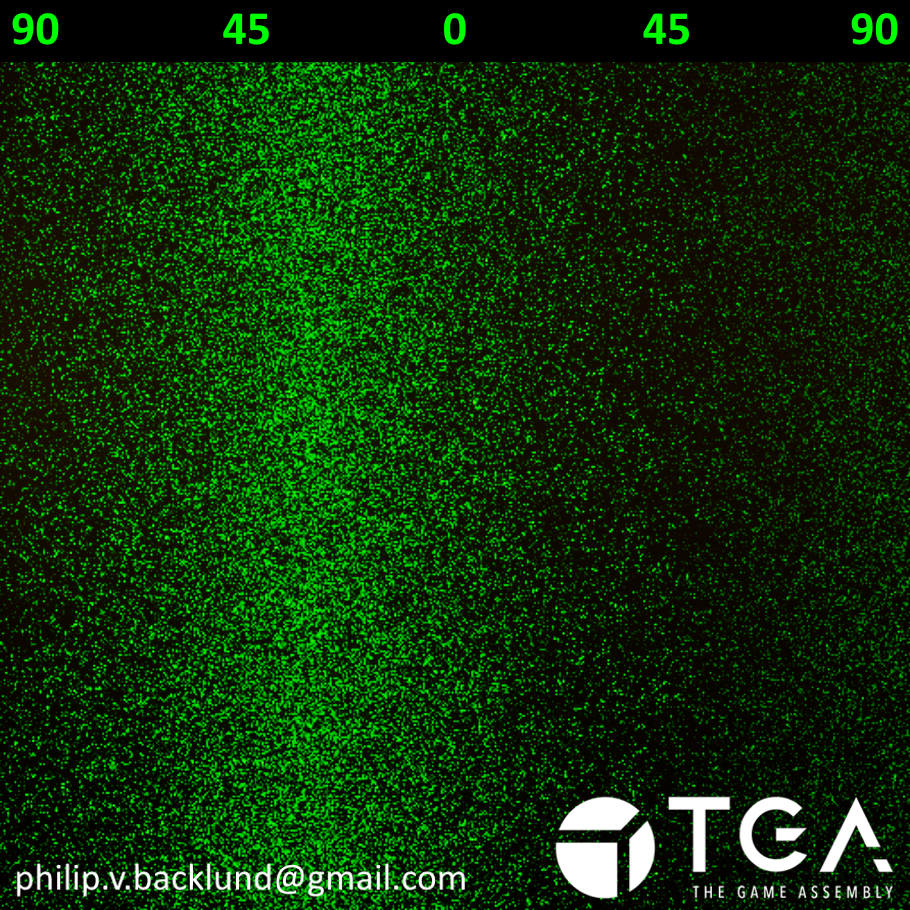
The passive sonar is a waterfall graph that shows the direction towards certain objects in the world. The idea is that these objects would be points of interest or dangers like torpedoes.
On the graph the vertical axis is time, where new information is at the top and scrolls down with time.
The horizontal axis is the angle to the object. 0° is the center of the center and 90° right is the right edge of the image.
In the video, you can see the submarine ( Green Box ), 3 targets ( Red ) and the passive sonar waterfall graph that’s tracking the 3 targets.
Video demonstration of passive sonar
How the passive sonar works
I use noise to give a hint about the distance from the objects.I send the submarine position and object positions to a compute shader and calculate the angle to each object to place the signal along the horizontal axis.
At that position, I add noise to the top row of the texture. The noise is strongest at the object’s angle and fades outward from that point. The spread depends on distance, so closer objects produce tighter and stronger signals.
Each frame, the texture scrolls downward to create the waterfall effect. I also add a layer of ambient noise so the display remains active even when there are no strong signals present.
The pasive sonar detecting an object at 30° left
Things I would like to do if I had more time
Panini ProjectionAdd panini projection to the imaging sonar slices to reduce the perspective distortion at higher FOVs to allow for a higher spin speed and image quality.
Drawing on the map
Ability to draw on the map because it would be nice to be able to mark points of interest on the map so you don’t accidentally go to the same spot multiple times.
Looking up with imaging sonar
Adding player control over the imaging sonar angle to look down, forwards or up to allow the player to see things above the submarine as well as below which would allow for more interesting level design with things like caves. I would need to update how the colors are decided to make both ceilings and floors readable.
Passive sonar scrolling in a material
I realized this while writing that I could've done the scrolling in a material meaning that I would only need to update one row of pixels in the compute shader.