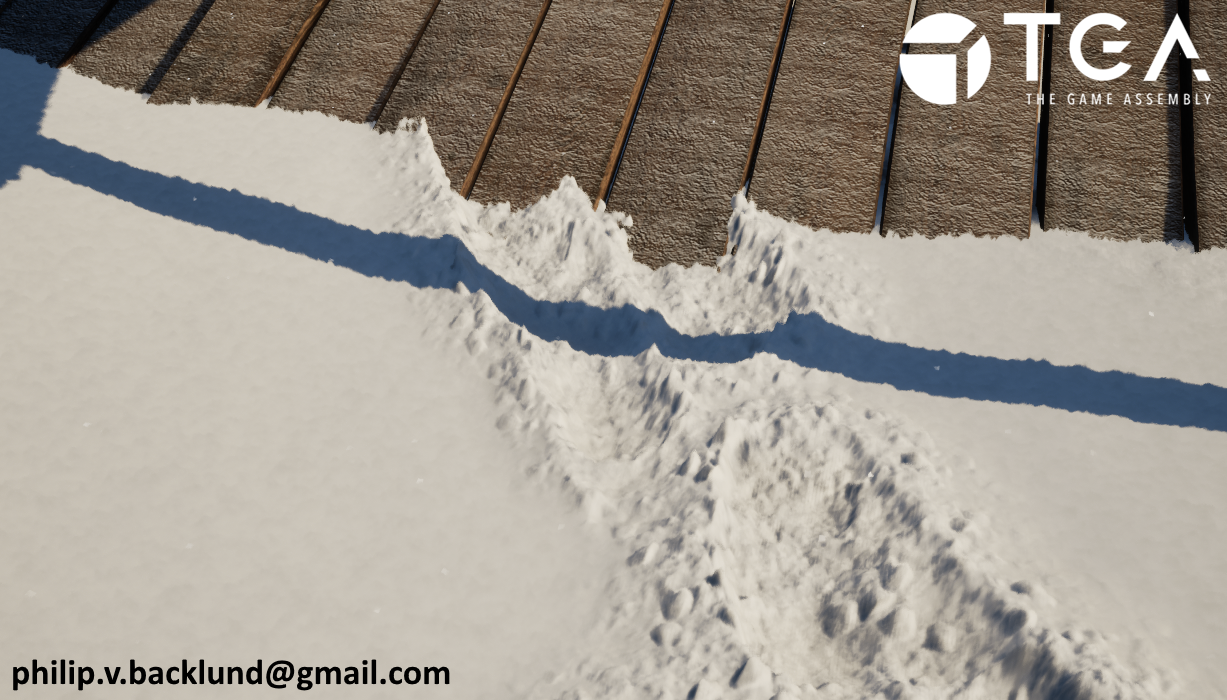
Snow Deformation
For the cabin and props I used Modular Rural Cabin by Maarten Hof
For the landscape I used heightmaps from StampIT! Collection - FREE Examples by Rowlan
My main insperations for using Parallax Occlution Mapping for snow deformation was The last of us part 2 and God of War 2018
Paolo Surricchio GDC talk about GoW Ragnarok's Snow Deformation inspired me to make sure that my snow was not limited to flat ground
Intro
I created deformable snow in Unreal Engine using a compute shader that writes to a render target, which is then used as a dynamic heightmap. A custom manager tracks all objects interacting with the snow and passes their transformation matrices, along with deformation area bounds and maximum snow depth, to the shader.To be able to achieve a high level of detail I modified Unreal’s own Parallax Occlusion Mapping function. In its default setup it uses one texture as input, so to avoid an extremely high resolution heightmap I added the ability to mix in detail height textures.
The glitter in snow is caused by a lot of tiny, shiny surfaces in the snow that reflect light in different directions. To simulate this I use noise as a direction and compare it with the direction from pixel to camera, the closer the angle the higher the emission.
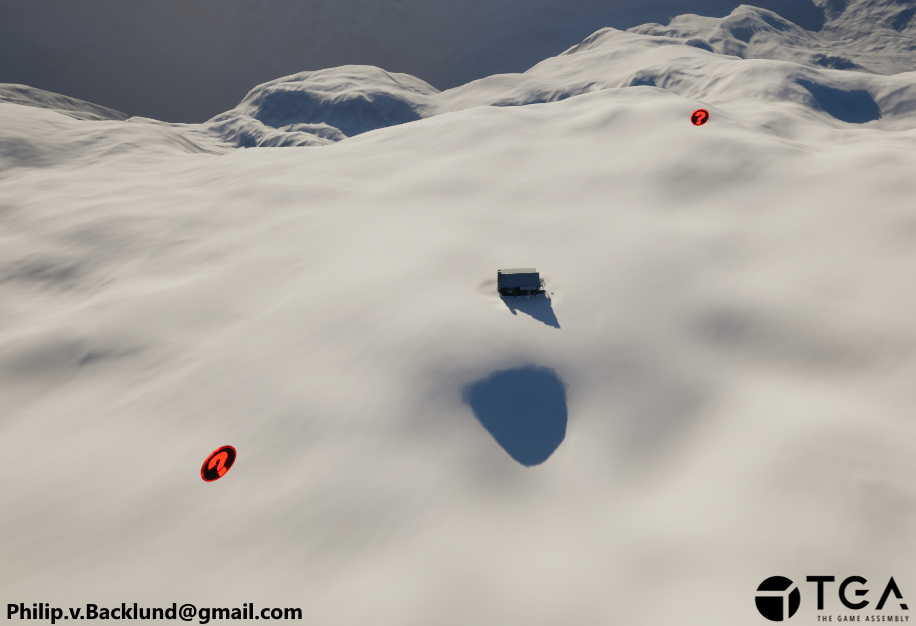
My goal with this project was to create a deformable snow that works on uneven terrain.
 Glitter
Shader Setup
The shader setup was the same as it was in my submarine project .
Decision to use Parallax Occlusion Mapping over Nanite
At the start of the project, I wasn’t sure if I wanted to use Nanite displacement or Parallax Occlusion Mapping (POM).POM felt like the more interesting option. It gets overshadowed by Nanite/Tessellation, but God of War (2018) and The Last of Us Part II use parallax techniques for their snow very effectively, which got me interested in using POM for this project. It also seemed like it would be more interesting to work with, since Nanite deformation is basically just driving a single float.
Nanite was also appealing because it is straightforward and works well for adding snow buildup on objects. I did early experiments using Nanite displacement and bevels, and the results looked promising. The main issue was that the displacement does not follow the vertical axis as it follows the vertex normal. I tried forcing normals upward and storing the originals as vertex colors, but this approach would not work on landscapes without either modifying engine code or using the landscape as a static mesh.
With POM, the deformation direction issue was much less noticeable and modifications to POM would not require a custom engine build which caused me to make the final decision of focusing on POM.
I did end up adding support for nanite too and I found out that once the project was finished and the pileup and detail textures were applied to the deformation, the displacement direction issue ended up being a lot less noticeable.
Special thanks to Marinó Fannar Bjarnason for using Houdini to create the meshes I used in the vertex normal experiments.
Quick test for adding snow on objects with a bevel and nanite
 Test with multiple bevels

Test with multiple bevels
Defining the deformable area
I needed to define my area for the deformable snow in world space. Just using two positions works but would be annoying to work with because editing world positions with sliders would be very finicky.To make the process of defining the area simpler, I created two Snow Corners( Red objects in the picture ) that I place in the world. To resize the area I just reposition the Snow Corners in world space.
The red objects define the deformable area
Deformation Manager
I need the snow corner positions, the max snow height and all the matrices of objects that can interact with the snow to be sent to a compute shader.To do this, I created a manager that kept track of all the data the compute shader needed access to.
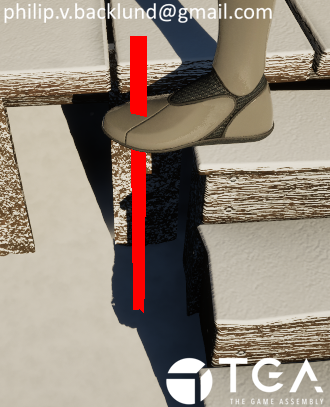
To get it to work on slopes I would need some way of getting the height of the ground.
I decided to bake this information into the matrices vertical positions. To achieve this the manager does linetraces downwards from the object and replaces the vertical position of the matrices with the hit distance. This means that the vertical position becomes local to the ground below.
This isn’t perfect though, because it’s basically just raising or lowering a flat plane with the terrain. I planned to improve the collision by using the hit normal to rotate the plane but since the issue wasn't that noticeable I felt like my time could be better spent elsewhere.
The reason why I decided to send entire matrices is because I wanted to add support for different collision shapes like capsules and boxes which in the end I did not have time to do. I currently only have support for spheres.
The line trace that gets the foots distance from the ground
Height map render target from Compute Shader
The issue with just using one channel for the snow is that the deformation and the pileup that I want around the deformed area would need to be baked into the same channel. This would make it harder to separate the deformed area and the pileup for applying the detailed textures. It would also mean I would be unable to iterate on the pileup settings on the fly through the material.That’s why I decided to use two channels instead, red for deformation and green for pileup. This means that I could have control over how the channels get applied. It also gives me two perfect masks for the deformation and pileup that I can use to apply the detail textures later.
When the snow remained untouched it looked really flat and boring. To solve this I added some random noise to the heightmap ( Red channel ) at startup to get some subtle height variation in the untouched snow.
When calculating the collision I treat all objects as spheres and use the matrices for position and scale.
I calculate the intersection between the spheres and the snow, if an intersection is found I lower the heightmap (Red channel) by the intersection amount.
For the pileup I raise the value in the green channel around the spheres at a larger distance than the radius of the sphere to get it around the deformed snow.
The render target result from the compute shader
Red: Snow heightmap
Green: Pileup mask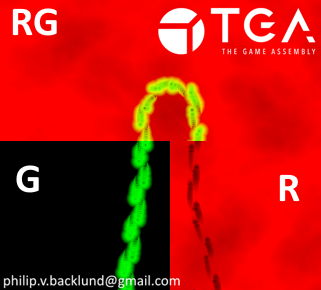
Red: Snow heightmap
Green: Pileup mask
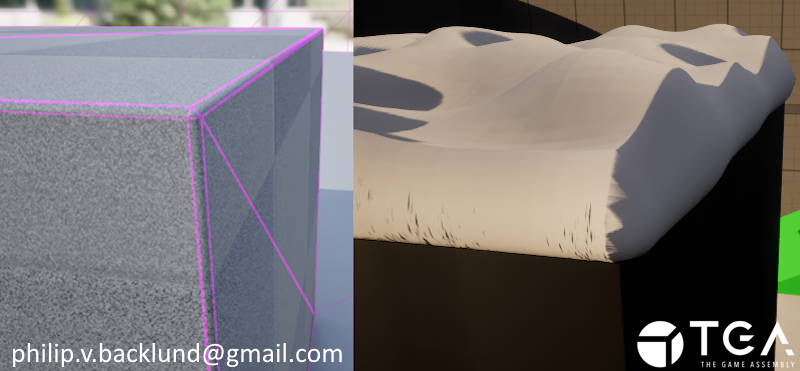
Raising the vertices.
Because POM can’t occlude more than the mesh I raise the vertex positions by the max snow height.
Vertecies being raised
Parallax Occlusion Mapping.
I use the red channel from the render target as the heightmap for my POM function.To avoid other objects looking like they are floating over the deformed snow I use the pixel depth offset to reveal objects below the snow to get a more convincing 3d effect.
To avoid the snow looking like smooth plastic I add in the blue channel from the detail texture to the height in the POM function to get some fine grain detail. I also use the blue channel from the detail texture to add some color variation as well on top of the small bumps.
Parallax Occlusion Mapping with pixel depth offse
Pileup
So far the red channel has been using 100% of the POM’s 0-1 range which leaves no range left for the pileup.To maintain a 0-1 range I added an input to the POM function that controls what amount of the range is used for the pileup and deformation. In the image it’s evenly split at a value of 0.5.
To avoid the pileup creeping in too much in the deformed area I multiply the pileup (Green Channel) with the heightmap (Red Channel) before adding the pileup.
Detail for height and color
Pileup now share the 0-1 range with the heightmap
Pileup now share the 0-1 range with the heightmap
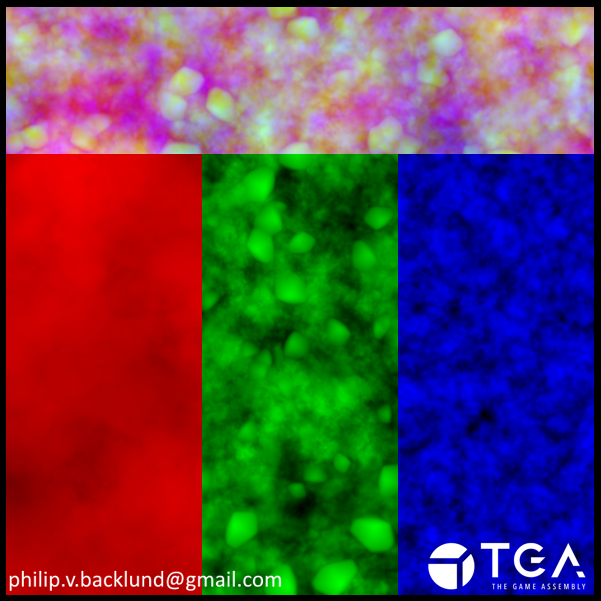
Applying the detail texture
The snow currently has a very smooth and boring appearance. Also the resolution and distance the objects moved per frame is clearly visible in the deformation.To make it look less boring while also hiding the issues I add in the Red and Green channel from the detail texture. I use the red channel of the detail texture to add detail to the deformation (Red channel). To add detail to the pileup (Green Channel) I use the green channel of the detail texture.
Because the values need to stay within a 0-1 range I need to combine the details instead of just adding it.
To do this I start by using the render texture channels to mask out the areas that should not have detail like outside of the deformation/pileup areas. Now I have 2 separate 0-1 values, the render target and the detail value. I do this for each channel separately.
To be able to have control over how much range is used for the overall shape and how much is used for the details I lerp between the detail value and render target value.
The detail texture being applied
Things I would like to do if I had more time
Capsule shape supportDeformation is currently only done with spheres, which can cause visible stepping artifacts when objects move too quickly. Replacing these with capsules that go between its previous and current positions would smooth out these artifacts.
Box shape support
Adding support for box collision would allow for box shaped objects to interact with the snow
Movable deformation area
Adding support for moving the deformation area with the player.
Rotate snow collision plane
The line trace that gets the object's distance from the ground, I would like to use the hit normal from it to rotate the snow collision plane towards the hit normal. This would make the snow collisions more accurate in most cases